How To Connect Firebase To Your Android Application
About
You can watch the videos in the carousel for extra information. The steps below are short step by step guid that will show you how to set up firebase with your android application. This blog was a set of instruction from a school project as found in repo linked below. This repo provides example code for Creating, reading, update and deleting object from the firebase database. The videos link above will cover all of these operations. This document doesn’t. It will show you how to link database to you application.
Requirments
- Google Account
- Android Studio (Or you will have to do extra steps not listed in this tutorial)
Creating a firebase project
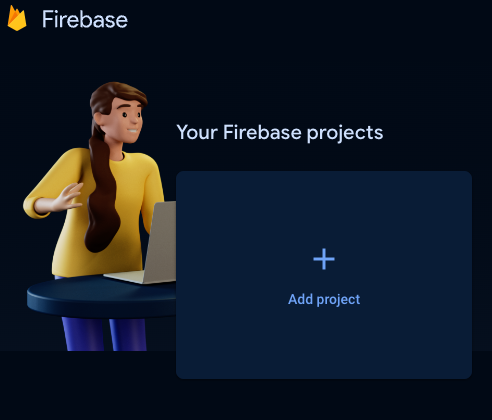
Step 1: Create Google account
Go to https://console.firebase.google.com and login into your google account. Then click Add Project
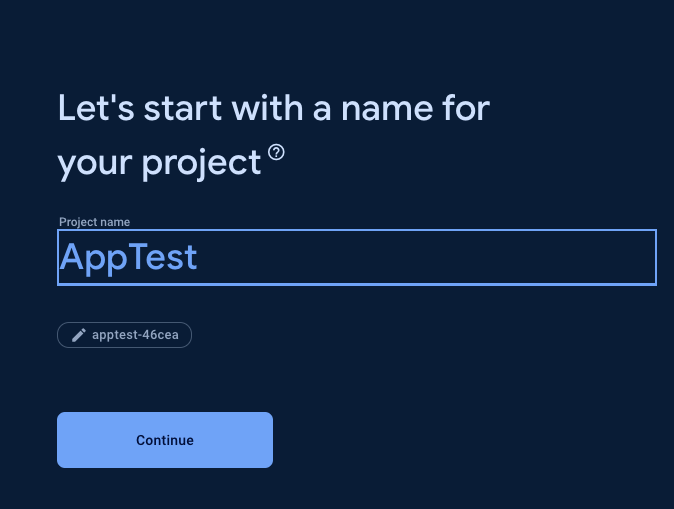
Step 2: Choose a Name for you project
Enter the name for your firebase project. (It doesn’t really matter)
Connecting a Firebase project to Android application
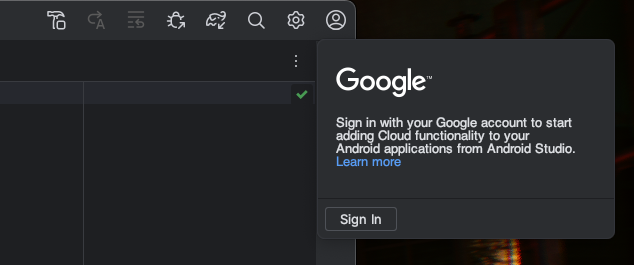
Step 3: login into google in Android studios
Open android studio and sign into Google Which can befound in the top right corner of android studio. Make Sure to use the same google as you used to make your firebase project.
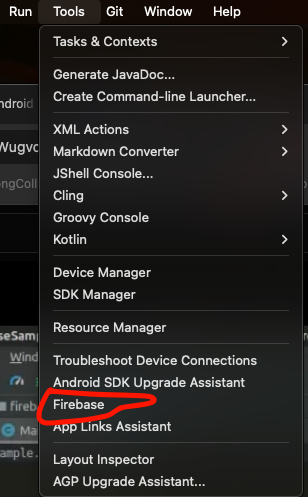
Step 4
Go on the window bar go to Tools > Firebase
Step 5
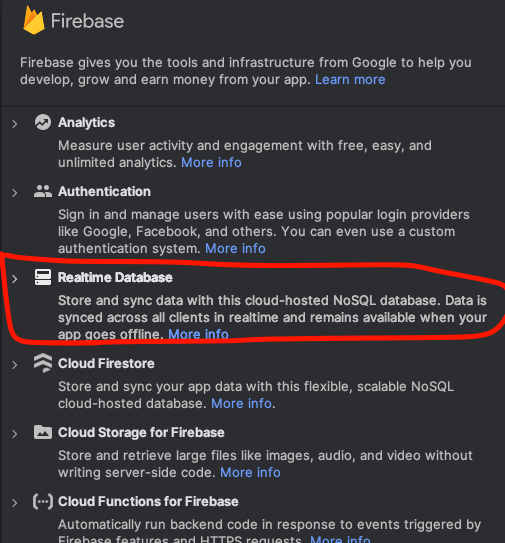
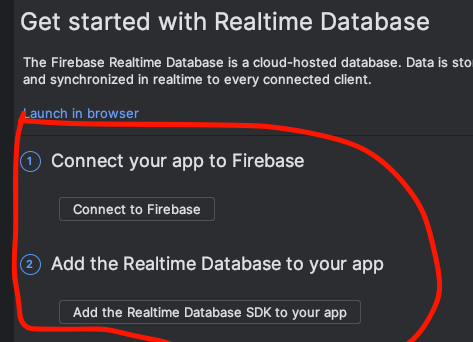
Click on Realtime Database. Then two links should appear Click on Get Started with Realtime Database [JAVA]
Step 6
Click Connect to Firebase
Step 7
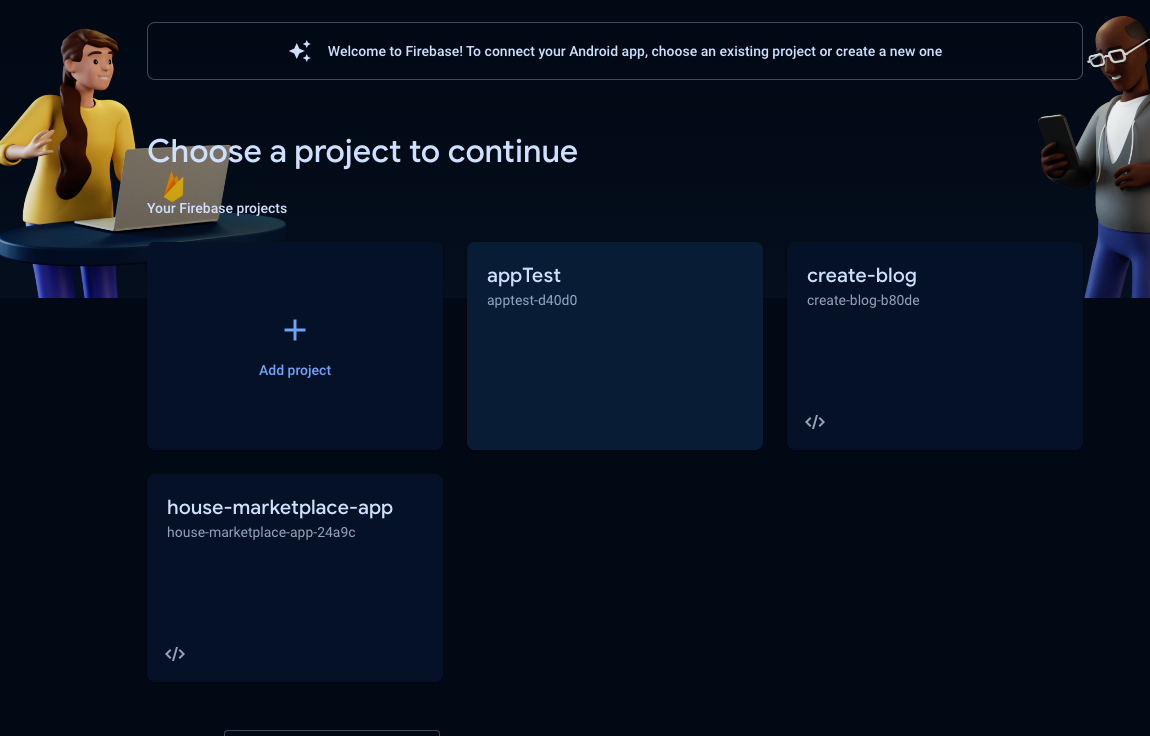
A window should open in your browser which opens to the firebase console. Select the firebase project that you want to connect to your application
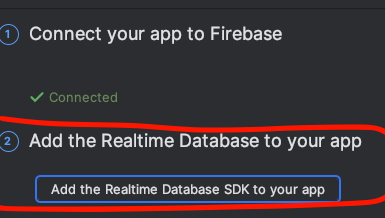
Step 8
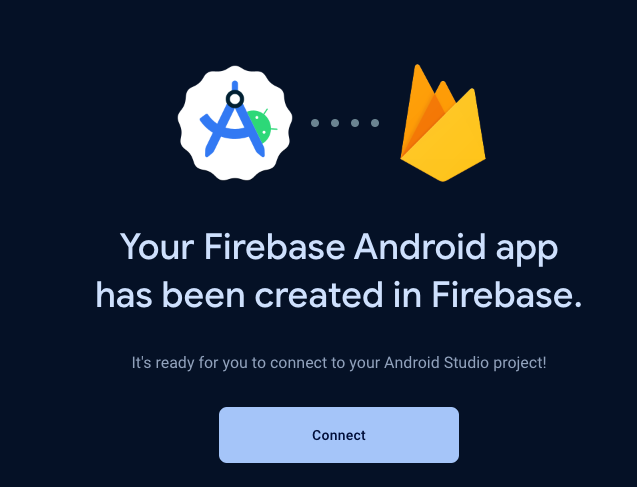
If firebase has been connected properly this screen should appear
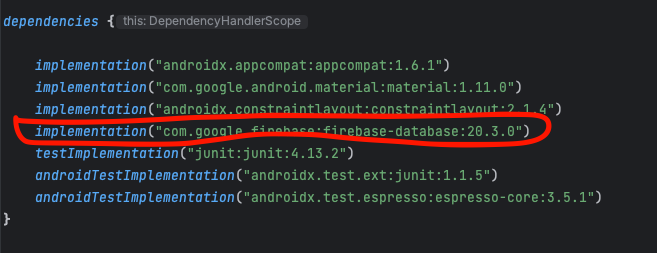
Step 9
now go back to Android studio and the page from step 6 should be still open and click the same button as circled below A window should appear and click Accept changes. It will make changes to your gradle file as show in step 10
Step 10
Step 11
Go back to your https://console.firebase.google.com/ and open up your firebase project.
Then on the navigation bar on the left go to Build > Realtime Database > Create Database
And select the location you want your database. Then click next
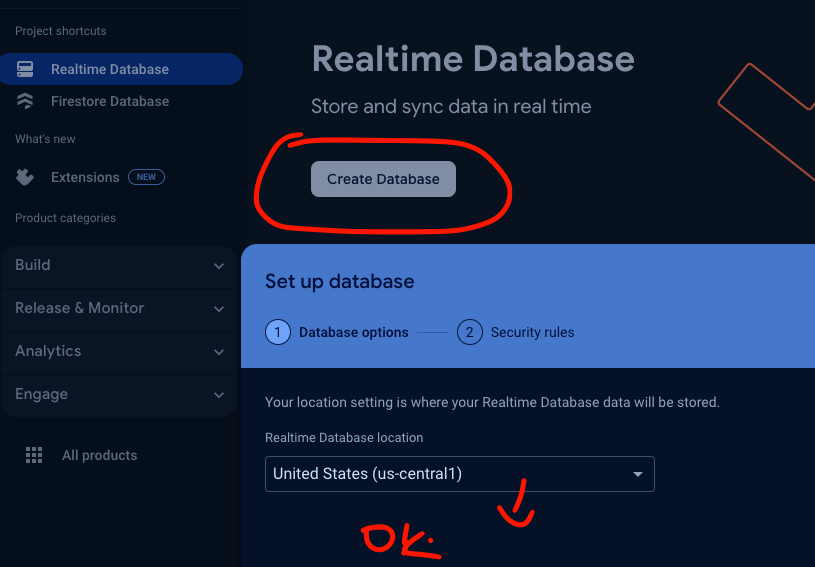
Step 10
Before you click next again make sure you select testing mode. and the rules below should be set to true or else you won’t be able to read or write to the database.

Step 11
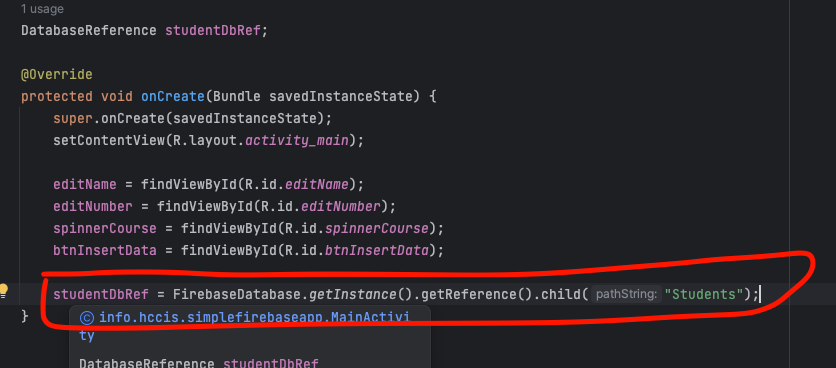
Add this object to the top of your class where you are going to make a connection to the database as shown below.

Step 12
Enter the code in below and now you have access to your realtime database from you android application The .child is where you would put the name of the collection (Its like a table’s name in a mysql database)
References
Video Tutorial
- Beginner’s Guide to Firebase Real time Database Integration with Android Java - This Covers More stuff than required. Most Crud operations 😉
- How to connect firebase to a android application - (Shorter - Less Content) The orginal tutorial video. Cover basically the samething in this artical
Working Examples
You can see and test the code for yourself to see how it works.
- SimpleFirebaseApplication - By Edwin Ngwa Mfoe
- SoccorJerseyLibrary - By Joshua Mckenna
Examples For All Crud opertations
Offical Docs
- Repo to used coded - https://bitbucket.org/joshuamcke…
- Firebase console - https://console.firebase.google.com/
- Firebase Docs - https://firebase.google.com/docs
- Firebase Realtime Docs - https://firebase.google.com/docs/database
- Firebase Cloud Firestore Docs - https://firebase.google.com/docs/firestore